 novityinfo
Simple Ways to Record a Teams Meeting: Built-in and Other Options
Advertisement
Recording a Teams meeting is a smart way to save important conversations, lectures, or project updates so you can watch them later. Whether you’re a student trying to catch every detail of an online class or a worker keeping track of a project discussion, knowing how to record can be helpful. Microsoft Teams has a built-in recording feature, but sometimes you may need other methods. Let's break down both ways in a simple, easy-to-follow way.
How to Use the Built-in Recording Feature in Microsoft Teams?
If you use Microsoft Teams and want the easiest way to record a meeting, the built-in recording tool is your best friend. It's already there; there's no need to install anything. But not everyone can use it anytime—they need the right permissions.
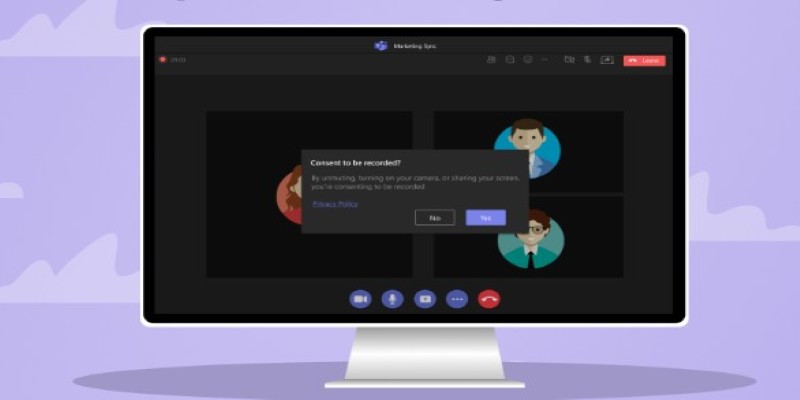
To start recording during a Teams meeting, you must be the meeting organizer or part of the same organization. If you are, look for the three dots (...) on the meeting control bar. Click them, then select Start Recording. A small notification will let everyone in the meeting know that the recording has begun. Teams will automatically save the recording to OneDrive or SharePoint, depending on your account setup.
Stopping the recording is just as simple. Click the three dots again and select Stop recording. After the meeting ends, you’ll find the recording link in the meeting chat. You can click it to watch, download, or share the video.
One thing to remember is that Teams won't record things like breakout rooms separately. It only captures the main meeting window. Also, if your organization's admin has disabled recording, you won't see the option.
What to Do If You Can’t Use Teams’ Built-in Recording?
Sometimes, you'll click around and realize there's no option to start recording. Maybe you're using a personal account, your school or company turned off the recording feature, or you're just a guest. In cases like these, you'll need another plan.
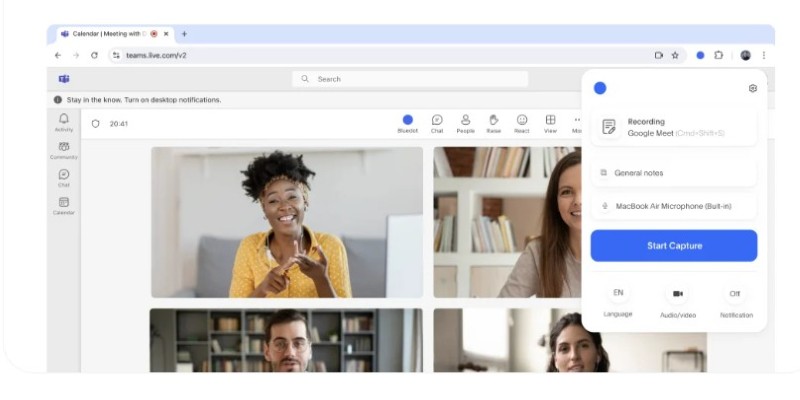
One solution is to use a screen recording program. Many free and paid options can capture whatever is happening on your screen, including your Teams meeting. Tools like OBS Studio (which is free), Xbox Game Bar (built into Windows 10 and 11), or online screen recorders like Screencast-O-Matic can do the job.
Setting up a screen recorder is usually pretty easy. With OBS Studio, for example, you just open the program, select "Display Capture," and start recording before your meeting begins. If you're using Xbox Game Bar, press the Windows key + G to open it, then hit the record button. It will save a video of your entire screen, including sound.
Remember that screen recorders won't announce to other people that you're recording. It's good practice (and often required) to tell everyone before you hit the record button, especially if you plan to share the recording later.
Using your recorder gives you more control. You can choose where to save your videos, edit them afterward, and record things that Teams normally doesn't, like breakout sessions or side chats.
Best Tools for Recording a Teams Meeting without Built-in Support
If you want to go beyond Teams’ built-in recorder and need something more reliable, several tools can help. Some are free; others might cost a little but offer extra features like editing or direct uploads to the cloud.
OBS Studio
OBS Studio is a top choice for many because it's free and open-source and works on Windows, Mac, and Linux. It's a little more complicated to set up the first time, but once you get the hang of it, it's very powerful. It lets you capture your full screen, specific windows, or even just parts of your screen. You can even mix different audio sources if needed.
Xbox Game Bar
Xbox Game Bar is already built into most Windows computers. It's easy to open with just a shortcut (Windows key + G) and requires no extra downloads. It's good for basic recordings but might not offer many fancy features.
Screencast-O-Matic
Screencast-O-Matic is a lightweight online recorder that doesn't need a download if you use the web version. You can record up to 15 minutes for free, and if you need longer videos, their paid version is pretty affordable. It also offers easy editing, like trimming and adding captions.
Camtasia
Camtasia is a paid tool that teachers, YouTubers, and businesses often use because of its easy editing tools. You can record a meeting and immediately cut out the boring parts, add highlights, or insert notes.
When choosing a tool, think about what matters most to you. Do you want something free and simple? Go with Xbox Game Bar or OBS Studio. Do you want easy editing? Maybe look at Camtasia or Screencast-O-Matic.
Tips for Better Recording Results (with or without Teams)
Recording a meeting isn’t just about pressing a button. A little planning can make your recordings look and sound much better.
First, check your microphone settings. Ensure your mic works properly and your volume is clear but not too loud. If possible, use headphones with a built-in mic to avoid echo and background noise.
Second, clean up your desktop. If you’re recording your screen, close unrelated tabs and programs so your meeting stays the focus. You don’t want distracting pop-ups or messages getting caught in your video.
Third, test your recorder ahead of time. If you're using a new tool like OBS Studio or Screencast-O-Matic, run a quick test before the meeting to ensure it's capturing the right screen and recording sound properly.
Finally, let people know you're recording. Even if your tool doesn't announce it, it's good manners—and sometimes legally necessary—to tell everyone at the start of the meeting. A simple sentence like, "Hey everyone, just a heads-up, I'll be recording today's meeting for notes later" works fine.
Conclusion
Recording a Teams meeting is easy once you know how to do it. If you can use the built-in feature, it's just a few clicks away. But if that's not an option, screen recording tools like OBS Studio, Xbox Game Bar, or Screencast-O-Matic are great backups. No matter how you record, remember to prepare a little beforehand so you get the best results. Good recordings save time, help you review important details, and make your online meetings more useful.
On this page
How to Use the Built-in Recording Feature in Microsoft Teams? What to Do If You Can’t Use Teams’ Built-in Recording? Best Tools for Recording a Teams Meeting without Built-in Support OBS Studio Xbox Game Bar Screencast-O-Matic Camtasia Tips for Better Recording Results (with or without Teams) ConclusionAdvertisement
Related Articles

Top Movie Making Tools for New Creators and Experienced Editors

Snagit vs Camtasia: Choosing the Right Tool for Your Screen Capture and Video Editing Needs

Add Music to Your Slideshow for Free with These 8 Simple Options
Simple Ways to Record a Teams Meeting: Built-in and Other Options
Translation and Codec Features Arrive in New Owncast 0.2.2 Release

Convert MKV to iPad Free and Fast with These Top Tools
5 Best Xbox Converter Apps and Devices for Mac

Top 5 4K Monitors You’ll Love for Gaming, Work, and Beyond
The Ultimate Guide to Converting M2TS to MP4 (3D Plus) for Easy Viewing

Klaviyo vs. Mailchimp: Best Email Marketing App in 2025

6 Best Game Capture Tools for Smooth and Easy Recording