 novityinfo
How to Record Your Gameplay on PC Like a Professional: Essential Tools and Tips for 2025
Advertisement
Whether you’re sharing a last-second win, making tutorials, or building content for your channel, recording your gameplay can be just as satisfying as playing. It’s easy to think those clean, high-quality videos come from fancy setups or costly software. But the truth is, most of what you see online is made using free tools and a bit of system know-how. Recording like a professional comes down to using the right method for your setup and game. Let’s walk through multiple ways to do it, from the simplest built-in tools to flexible software made for creators.
How to Record Your Gameplay on PC as a Professional
Using Xbox Game Bar on Windows
If you’re using Windows 10 or 11, the Xbox Game Bar is already available on your system. It's simple and doesn’t need installation. Press Windows + G to open it. You’ll see an overlay with various widgets. To start recording, either click the record icon in the Capture panel or press Windows + Alt + R. It quietly runs in the background while you play. When you’re done, the video lands in your Captures folder inside Videos. The Game Bar handles 1080p pretty well and has a low learning curve. It’s a good pick for casual recording or shorter clips.
Recording with OBS Studio
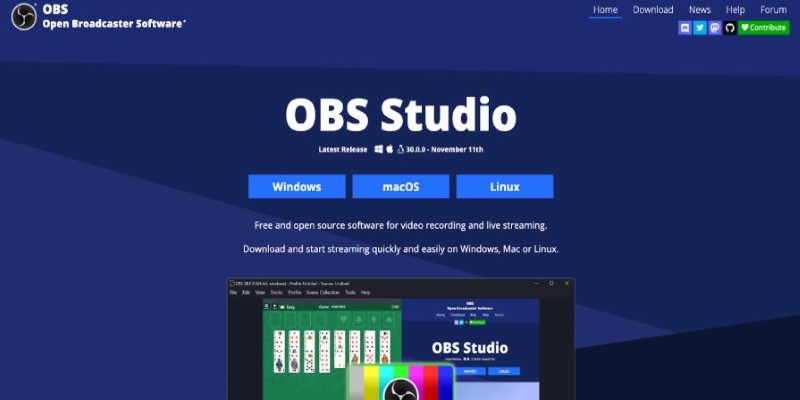
For more control, OBS Studio offers a full setup with flexibility for advanced use. It’s free, open-source, and used by content creators everywhere. After installing OBS, let the auto-configuration wizard guide you through setup. Then, add your game by clicking the plus icon in the "Sources" box and selecting Game Capture. You can choose which window to record and even add a webcam or mic input as separate layers.
Under Settings > Output, pick your recording quality and format. MP4 or MKV works best. Once everything’s in place, hit “Start Recording.” OBS will begin capturing your game, audio, and any extras you’ve added. What makes OBS stand out is that it works well with overlays, allows for multiple audio tracks, and doesn't limit your format choices.
Recording with NVIDIA ShadowPlay (GeForce Experience)
If you use an NVIDIA graphics card, you can record gameplay using ShadowPlay, built into the GeForce Experience software. After installing or updating it, enable the In-Game Overlay in Settings. Press Alt + Z to open the overlay, then click Record > Start. The Instant Replay option saves your most recent minutes of gameplay, so you don’t have to record everything just in case something cool happens.
ShadowPlay captures high-quality video and doesn’t slow your game, thanks to hardware acceleration. It’s a great choice for users who want high performance without touching complex settings.
Using AMD’s Adrenalin Software
For AMD GPU users, Adrenalin Software includes a built-in screen recording option. It’s light, fast, and doesn’t need outside tools. Once it’s open, go to the Recording section and set your video quality and resolution. Start and stop recording with the assigned hotkey (usually Ctrl + Shift + R). You can also turn on Instant Replay if you prefer to save short highlights instead of full sessions.
The files are saved automatically, and you can adjust the bitrate and resolution to match your system's performance. It's an efficient, no-fuss option if you're already using AMD hardware.
Using Bandicam for Lightweight Recording
Bandicam is a screen recording tool made for gaming, with a clear interface and a focus on performance. It's not free forever—there’s a watermark in the free version—but it’s often praised for how light it is on system resources.
Once installed, you can set it to capture full screen, specific windows, or just the game. Choose your format and framerate, then click Record. You can also set hotkeys to start or pause without exiting your game. Bandicam supports 4K, multiple audio tracks, and external devices like webcams. It’s especially useful if you want simple controls but still care about recording quality.
Using Flashback Express for Scheduled Recording

Flashback Express is a lesser-known option that works well for those who want to schedule recordings or add commentary afterward. It’s free, with optional upgrades for editing features. After installing it, open a new recording profile and choose whether you want to capture a full screen or a particular area. It records audio from both your game and mic, and you can set it to start recording at a certain time.
Once you’ve recorded your session, you can trim it or export it in standard formats like MP4, WMV, or AVI. While it lacks some of the live overlay features of OBS, it’s very straightforward and doesn’t require high-end hardware.
Using Steam’s Overlay (with Other Tools)
While Steam itself doesn’t offer full video recording, its overlay is handy when paired with other tools. It lets you check chat, take screenshots, or keep an eye on friends without leaving your game.
Make sure it's enabled in Steam Settings > In-Game. During a session, press the Shift + Tab to open the overlay. Then, start your external recorder (like OBS or ShadowPlay), and everything from your gameplay to chat will appear in the final video. It's not a full solution on its own, but it works well when combined with recording tools.
Conclusion
Recording gameplay like a pro isn’t about fancy gear or editing tricks. It’s about choosing the tool that fits your needs and setting it up with care. From the quick start of Xbox Game Bar to the detailed control of OBS and the efficiency of GPU tools like ShadowPlay or Adrenalin, there’s something for every level of gamer.
Take a few minutes to test your settings, make small adjustments where needed, and let the recording run while you play. With the right setup, your best moments will be ready to share—smooth, clear, and just as you intended.
On this page
How to Record Your Gameplay on PC as a Professional Using Xbox Game Bar on Windows Recording with OBS Studio Recording with NVIDIA ShadowPlay (GeForce Experience) Using AMD’s Adrenalin Software Using Bandicam for Lightweight Recording Using Flashback Express for Scheduled Recording Using Steam’s Overlay (with Other Tools) ConclusionAdvertisement
Related Articles
Snagit vs Camtasia: Choosing the Right Tool for Your Screen Capture and Video Editing Needs

Arc Browser Review: Is It Time to Make the Switch?
Step-by-Step Guide to Rotating a Video File on Your Computer
Top Screen Recording Tools You Should Try Instead of Any Video Recorder
Simple Ways to Combine WMV Videos Without Losing Quality

7 Best Online Tools to Create Picture and Video Collages

How To Add An Advanced Search Box In WordPress Using Facetious: A Guide

Convert MKV to iPad Free and Fast with These Top Tools
Trello vs. Todoist: Which Should You Use in 2025 for Tasks?

Master the Art of Recording Your League of Legends Gameplay

Step-by-Step Guide on How to Join and Merge Videos with the Best Video Joiners